Personalize your site with Clearbit Reveal [a quick guide]
[UPDATED] Originally published on July 29, 2019
Not every visitor to your website is a prospect. Some are just window shopping, while others are primed to make a purchase.
You wouldn’t use a one-size-fits-all marketing strategy to convert them, so why show everyone the same copy? Consumers expect personalized interactions. In fact, research from McKinsey shows that 76% of consumers get frustrated when companies don’t deliver them.
Clearbit Reveal enables real-time website personalization by matching IP addresses from your web traffic to company profiles. The result? Targeted messages for the prospects you care about the most — including all those leads you’ve already spent all that money driving toward your site — before form fills and sign-ups.
| Required ingredients for site personalization with Clearbit Reveal | |
|---|---|
| Audience | At least 1 segment you want to target, like specific:
|
| Traffic | At least around 20,000 monthly unique visitors (MUVs) |
| Technology | Clearbit Reveal (and resources to add Clearbit Reveal JavaScript snippet to your site) Recommended personalization platforms:
|
Jump ahead to:
- Can your business benefit from web personalization?
- What are the steps of website personalization?
- Website personalization ideas you need to get started (+ advanced tips)
- Small moves, big returns: How real-time website personalization influences the bottom line
Can your business benefit from web personalization?
If you’re a B2B business that serves more than one segment and is getting enough monthly traffic (we generally look for 20,000 monthly unique visitors), your website should be able to enjoy the benefits of website personalization by speaking directly to those segments. This include business models or go-to-market strategies that involve:
- Serving multiple industries
- Offering different levels of service or distinct plan tiers, such as:
- Self-serve or freemium plan vs. high-touch accounts
- Business vs. consumer
- SMB vs. enterprise
- Team vs. individual
- Pursuing specific target accounts (ABM)
- Offering multiple products
- Dealing with a frustrating amount of noise as a result of inbound lead volume

What are the steps of website personalization?
You can offer real-time personalization on your website in five simple steps:
Step 1: Use a website personalization tool
First, you need access to Clearbit’s Reveal technology. As with many martech tools, you do need the ability or resources to drop a small JavaScript snippet on your site. This step turns your anonymous web traffic into full company profiles.
Step 2: Collect data on your website’s visitors
A well-executed website personalization strategy relies on accurate data. You probably already have a good amount of data on your visitors that can be used to tag and segment them based on behaviors that reveal their stage in the buyer journey.
If you’re unsure of where to find meaningful visitor data, consider looking at your website analytics, email analytics, survey results, support tickets, social media, and ad analytics. For instance, you can look at the pages with high bounce rates to see where you lose your leads.
Step 3: Create personalized content
Next, you need a way to create and serve up personalized content to those visitors. Plug-and-play personalization is the easiest solution. We recommend integrating Clearbit Reveal directly with these platforms:
- Google Optimize (how to integrate with Reveal)
- Optimizely (how to integrate with Reveal)
- VWO
- Mutiny (includes onboarding and personalization advising services)
- Intellimize
Or use Segment to connect your Clearbit Reveal data to a personalization platform.
Read next: 5 ways to personalize your website content in 2022
Step 4: Define specific audiences based on attributes
Once integrated, you’ll define specific audiences in your personalization platform. These segments will be based on attributes from Clearbit Reveal, such as company size, industry, tech stack, location, and more. You’ll be able to combine this firmographic information about your visitors along with their behavior on your site in your personalization platform to automatically serve up the most relevant experience for your key visitors.
(If you have developer resources and plan on coding up custom pages, head to our Reveal API documentation to start. Adding the client-side Reveal endpoint onto your site creates a dynamic JavaScript variable on page view that you can reference with custom code or any other front-end software that can reference custom JavaScript.)
Step 5: Identify metrics for success
You’ll want to monitor and optimize your personalization efforts based on your own KPIs. Here are a few metrics you may want to consider tracking:
- Visitor frequency: If your goal is to measure engagement, an increase in visitor frequency can indicate that your personalization strategy resonates with your audience.
- Time spent on page or website: If the amount of time spent on a particular page or the site goes up, it shows users are engaging with the personalized content.
- Actions taken on the site: If your aim is to improve the number and quality of MQLs, check if users are downloading assets or filling out forms and if they fit your ICP. If so, it’s likely your personalization tactics are paying off.
- Conversions: For goals tied to sales, conversions are a clear indicator of success. Track conversions tied to personalized content and see if there’s a measurable lift.
Website personalization ideas you need to get started (+ advanced tips)
If you’re new to site personalization, you can adopt one of two super-simple approaches:
- Start with your homepage and personalize one or more of these elements for one ideal targeted audience:
- Headline
- Logos
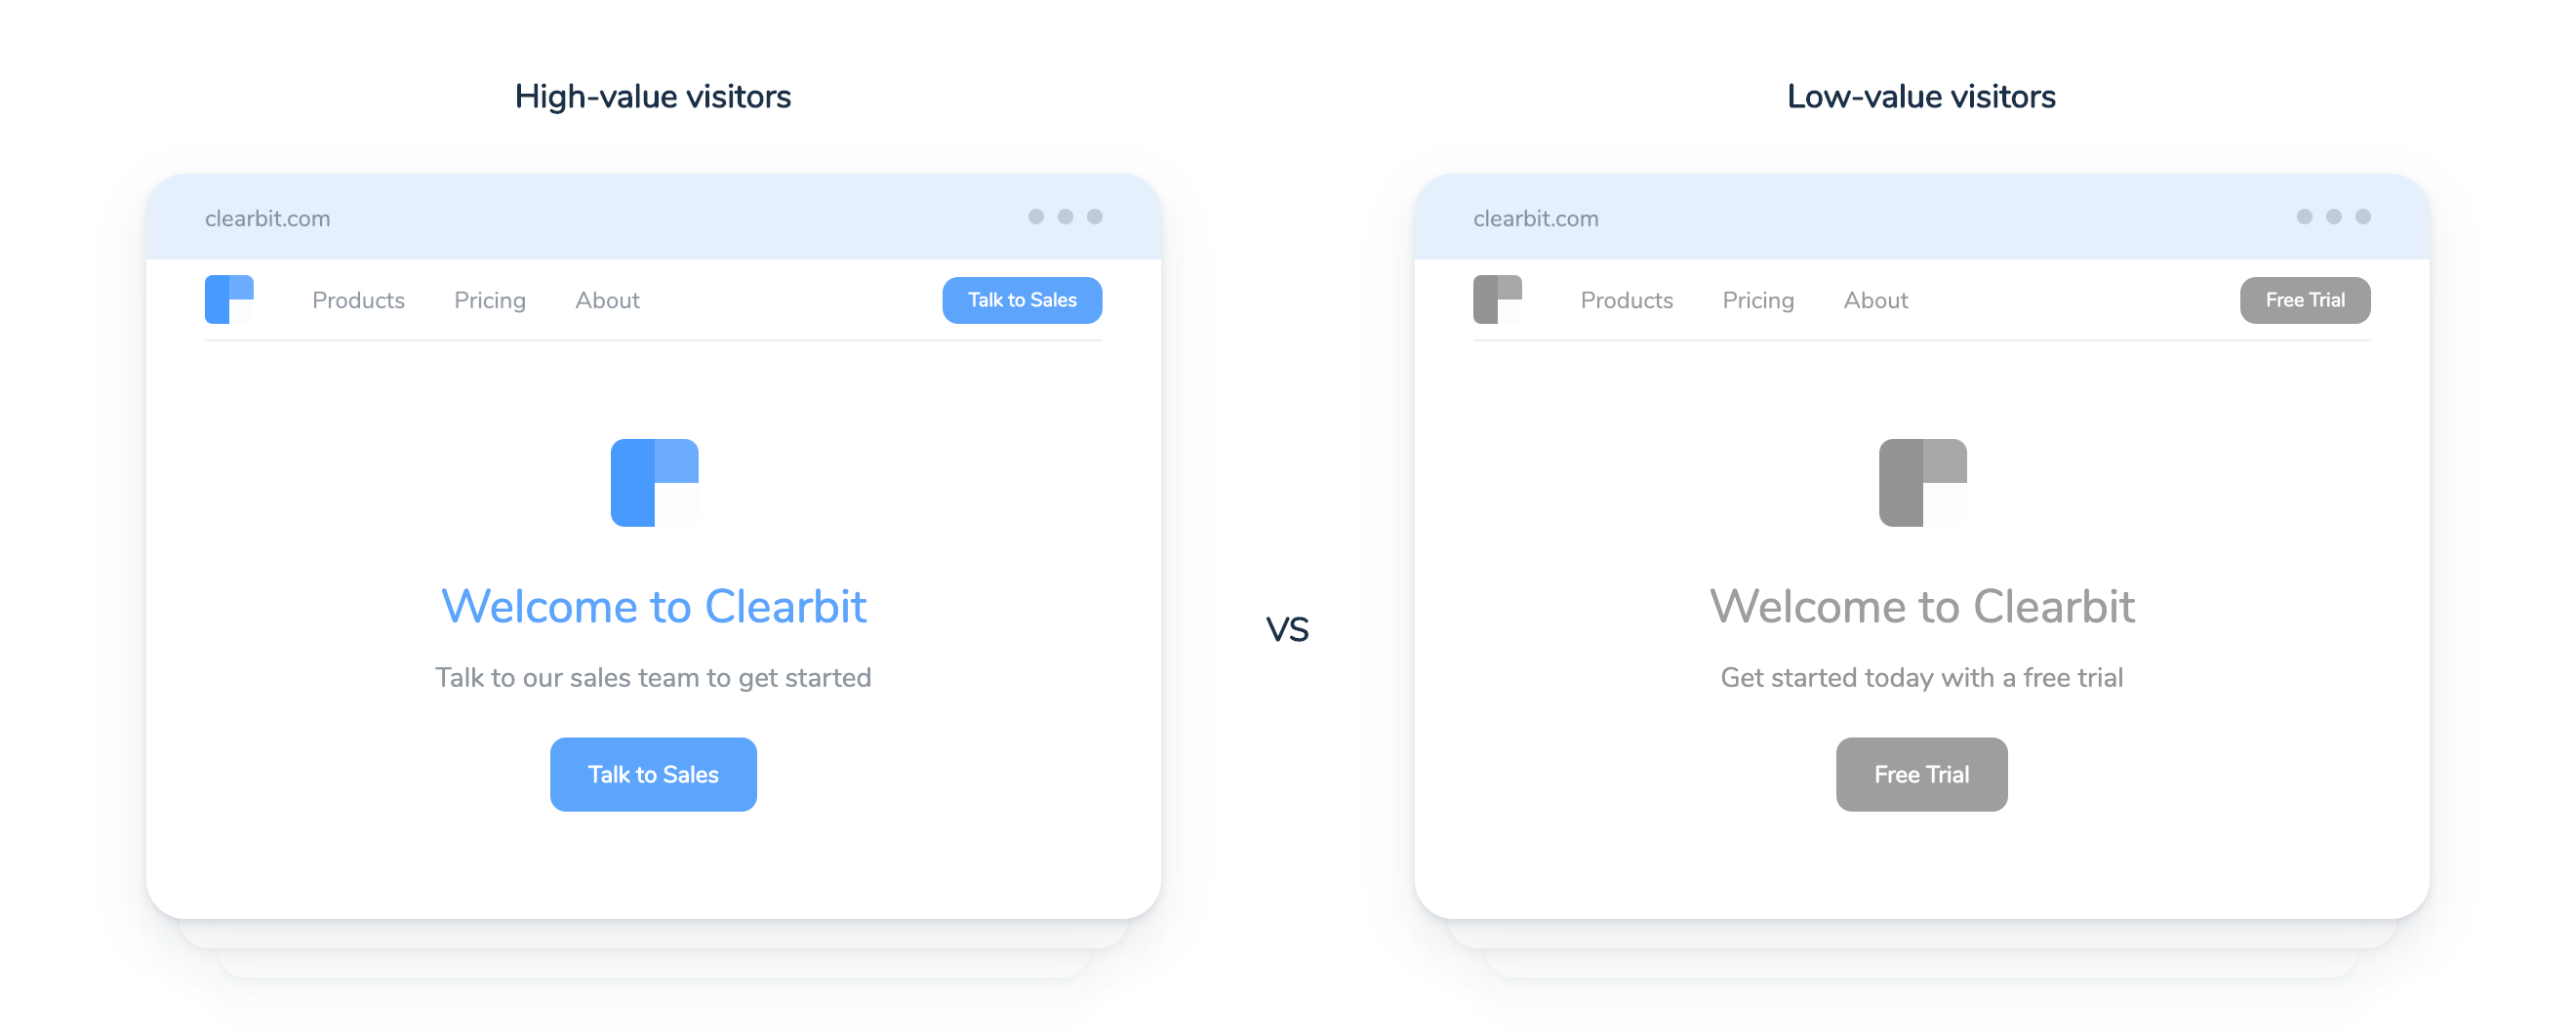
- Call-to-action button
2. Funnel visitors into the right-size plan on sign-up based on company size.
Once you gain some steam, try one of these more elaborate site personalization ideas:
- Emphasize customer logos or testimonials for social proof based on the visitor’s company size, industry, business model, or location
- Customize headlines or value props to resonate with the visitor’s specific segment
- Show special offers only if the visitor is a qualified lead
- Offer whitepapers based on the visitor’s industry
- Highlight product integrations based on the visitor’s tech stack
Discover additional ideas for personalizing your website using Clearbit Reveal data points. Or learn how to improve conversion by customizing five different site elements.
Small moves, big returns: How real-time personalization influences the bottom line
Site personalization can sound like a huge project, something a big consumer company like Netflix does, with lots of resources and fancy machine learning. But for most B2B businesses, you can start seeing higher-value conversions just by personalizing a few elements.
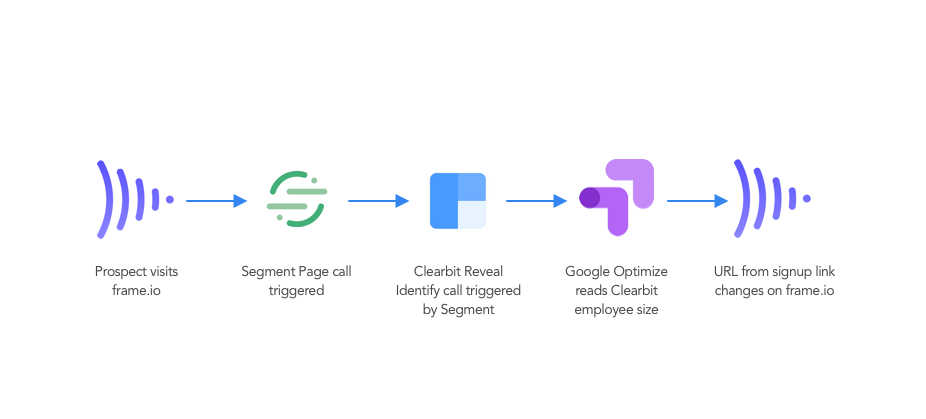
For example, Frame.io made over half a million dollars in ARR simply by using Clearbit Reveal data to create a simple URL routing variation with Google Optimize (via Segment). Instead of sending everyone into a generic free plan and relying on them to choose the right plan later on — an extra step — visitors from companies with over 10 employees were automatically routed to the Pro plan experience. And all it took was 30 minutes to set up.

Check out Chapter 2 of our Data-Driven Marketing eBook — Website Personalization — for more real-life examples you can emulate.
